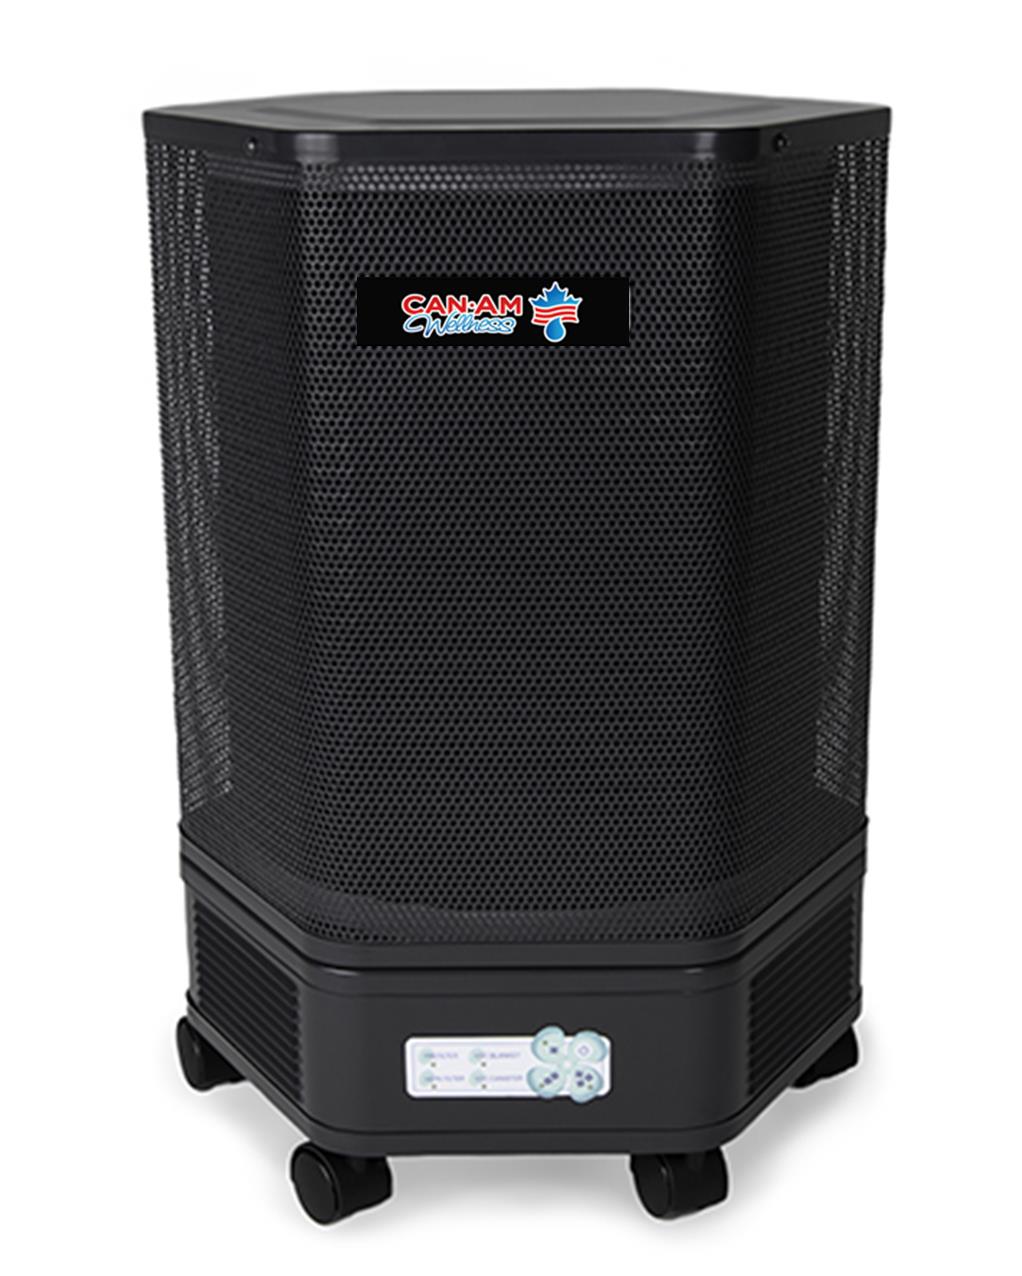
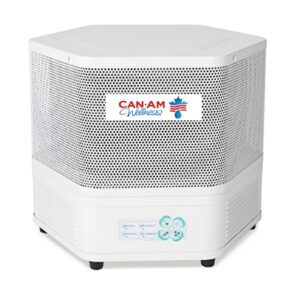
OPERATING YOUR CANAM WELLNESS MODEL 1700 HEPA AIR FILTRATION SYSTEM
OPERATION
- Place the unit in the area where you want the cleanest air.
- Plug the electrical cord provided into a compatible grounded outlet.
- To operate, select the desired speed by pressing firmly on one of the buttons marked “HIGH”,”MEDIUM” or “SILENT”. The appropriate white LED light will illuminate and dim after 3 seconds.
- To stop the unit operation, press firmly on the button marked “OFF”.
FILTER LIGHT INDICATORS
Your HEPA system is equipped with an electronic filter timer. This timer monitors the life expectancy of each filter in the unit. By default, the Pre-Filter, HEPA Filter and V.O.C. Blanket lights will turn on when the unit is powered on. After approximately 5 seconds these lights will turn off. When a blue LED filter indicator light flashes, it is time to check and replace that filter.- Turn the unit off and see instructions for “filter removal” to determine if filter replacement is needed.
Once the filters have been checked or replaced, turn the unit back on and reset the control panel.- To reset, press and hold the flashing filter button until the light is constant. After approximately 5 seconds, all of the blue LEDs will turn off.
STAGE THREE FILTER OPTION
If you have upgraded your V.O.C. Blanket to a V.O.C. Canister, you must activate the corresponding timer.- With the unit operating on “MEDIUM”, press and hold the V.O.C. Canister button until the light comes on. The V.O.C. Blanket light will automatically go off. After approximately 5 seconds, all of the blue LEDs will turn off. The control panel will now monitor the life expectancy of the V.O.C. Canister. If you are switching your V.O.C. Canister to a V.O.C. Blanket, you must activate the corresponding timer.- With the unit operating on “MEDIUM”, press and hold the V.O.C. Blanket button until the light comes on. The V.O.C. Canister light will automatically go off. After approximately 5 seconds, all of the blue LEDs will turn off. The control panel will now monitor the life expectancy of the V.O.C. Blanket.
CAUTION
- Make sure the cord is not in the path of people walking or where anything can be rolled overit.
- Do not place any objects on top of the unit or allow anyone to sit on it.
- NEVER place any liquids or plants on the unit. Moisture could leak into the unit and damage the filter media or electrical components.
- The air filtration system discharges the cleaned air through the vents near the bottom on four of the six sides. On “HIGH” the velocity of the air coming out is high to enhance circulation throughout the area being cleaned. If the airflow is bothersome or creates a draft, turn the unit until the air is directed toward an unoccupied area of the room.
ABOUT FILTERS AND SERVICE LIFE
The life spans of the individual filters are:
STAGE 1 PREFILTER: 6 to 12 months
STAGE 2 HEPA FILTER: 3 to 5 years
STAGE 3 V.O.C. BLANKET: 6 to 12 months
OPTIONAL V.O.C. CANISTER: 6 to 12 month
The useful service life of the filters is directly related to the volume of air passed through the system and the amount of contaminants in the air. If your indoor air contains abnormally high levels of airborne contaminants (such as cigarette smoke) the life of the filters may be shortened.
The HEPA filter’s particulate removal efficiency actually improves with use as it loads up with particulates. However, as it loads up it also becomes more difficult to move air through the system. If you notice a significant drop in air flow from the unit, the HEPA filter should be replaced.
THREE-STAGE FILTRATION
STAGE 1: Foam Prefilter
Removes large particulates and odors. Extends the life of the HEPA filter.
STAGE 2: HEPA Filter
99.97% efficient @ 0.3 microns. Removes dust, pollen, bacteria, animal dander, attached viruses, cigarette smoke, radon daughters and more.
STAGE 3: V.O.C. Blanket
Removes odors and hazardous chemicals that may off-gas from cleaners, paints, solvents, carpets, furniture and other items containing synthetic materials.
OPTIONAL V.O.C. Canister
For heavy-duty removal of gases and odors
HEPA Filter Replacement
As the HEPA filter captures particulates, it will darken over time. Replace the HEPA filter when it darkens
MAINTENANCE: FILTER REPLACEMENT INSTRUCTIONS
When a red LED filter light is flashing…
Opening the cabinet
- Turn the unit off and unplug it.
- Unscrew the 5 lid screws. Once all five screws are out, remove the metal cover.
- Bracing the unit so it does not move, turn the HEPA cartridge counterclockwise and lift/ pull out the pre-fiter.
- From the bottom up, pull the foam pre-filter over itself until the outside of the filter is covered. Pull the entire foam prefilter off of the HEPA cartridge. Discard the used prefilter.
NOTE: The pre-fiter may contain contaminants, remove it slowly to avoid releasing particles back into the air.
- Remove the plastic shrink wrap from the new prefilter.
- Stretch the new filter around the top of the HEPA cartridge and slide it down into place
HEPA filter
- With each annual filter replacement kit, a new ‘o’ ring is provided. The old one is removed by pinching it between two fingers and pulling it off the collar on the blower deck.
- Discard old ‘o’ ring.
- Place the new ‘o’ ring onto the collar and slide it down to the base of the blower deck.
- Place the new HEPA cartridge gently into the unit.
- When the HEPA cartridge is in place, brace the unit, press down and gently turn it clockwise to lock it into place. If too much force is used, the cartridge may be difficult to remove!
- If replacing the HEPA filter with a new filter, discard the old HEPA filter and use the new filter when replacing the HEPA filter into the unit.
Inner Carbon Filter Replacement
- Look inside the HEPA cartridge to locate the two ends of the inner carbon filter.
- Pull one end of the old inner carbon filter in and bend it into a loose roll so it can be removed.
- Remove the inner carbon filter from the HEPA cartridge.
- Remove plastic shrink wrap from the new inner carbon filter.
- Unroll the inner carbon filter and roll it up in the opposite direction (this makes the filter follow a more contoured profile against the inner HEPA filter surfaces and helps keep it in place), place the rolled inner carbon filter inside the HEPA cartridge and gently unroll it until the ends ‘butt’ together and the filter is snug against the HEPA filter.
V.O.C. Canister (OPTIONAL
- Remove old Carbon Filter by pulling it out from the inside of the HEPA filter.
- Remove the plastic shrink wrap from the new carbon canister.
- Place the carbon canister inside the Air Filtration System, larger end first.
- Slide the HEPA Filter over the V.O.C. Canister and down into the air filtration System.
- Gently, turn the HEPA Filter until it locks into place.
Closing the cabinet
- Position the top cover on the unit with the centered screw hole at the rear of the unit.
- To replace the lid screws, apply firm pressure to the top cover to align the holes and then insert and fasten screws.
- Plug the unit in and turn it on.
For more details and instructions call 1-877-523-7800